As you would have seen from my post yesterday, Thursday was Mr L’s 4th Birthday. He loves all things Avengers/Superheroes. He originally wanted Spiderman for his cupcakes, and with the effort this one took I’m so glad that I saved my effort for this cake.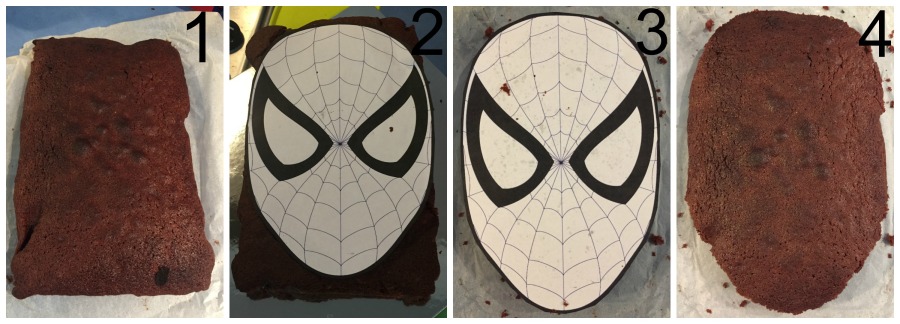
- First I baked the cake. I chose a Chocolate Devil’s Food Cake and baked in a rectangle brownie pan which was nice and deep (about 5cm).
- Once cooled. I printed out a colouring in page from Google. I just searched Spiderman Face Colouring Page and chose my favourite. I then re-sized in Microsoft Word to fit an A4 page, printed and then cut it out.
- Placed the piece of paper on the cake and then trimmed the cake using a serrated edge knife.
- Do this to both layers (if using 2, which I did)
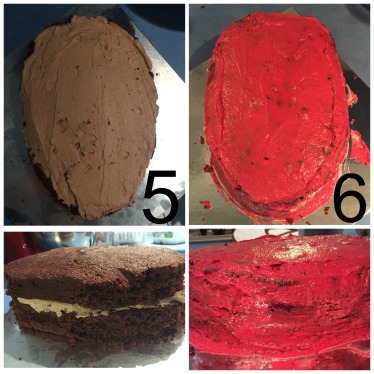 .
. - Chocolate Cream layer in between cake layers. To make this I put some thickened cream into my bowl (maybe about 200-300ml), 1 tablespoon each of cocoa powder and icing sugar and whipped until stiff. This was kind of an accidental genius moment as the result tasted like chocolate mousse and it was DELICIOUS!!!!! Put the second cake layer on top.
- Crumb Coat. I used Wilton’s buttercream recipe for my icing most of the time. Otherwise I just use regular butter in a packet and icing sugar with a splash of milk and play with the quantities until I’m happy with the consistency. The Crumb Coat isn’t supposed to be neat, and it isn’t supposed to be pretty, it’s designed to suck up and stick in the crumbs so that your top layer can be beautiful and smooth with no crumbs showing. Cover the cake and all the sides in icing,
 it doesn’t have to be a thick layer of icing, just thin enough to catch those crumbs, then put in the fridge for at least half an hour or so. Yes, it’s a pain in the bum step, but you’ll be glad you have done this when you get that perfect smooth crumb-free final look! You won’t regret it – I promise!!! I do this even if I’m piping on the cake instead of wanting a smooth finish, as it helps the piping stick to the cake.
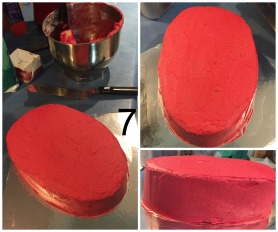
 - Now it’s time for your final icing layer – I use the angled spatula that you can see, it’s so much easier to get that awesome smooth look. See that beautiful finish…. isn’t it pretty??
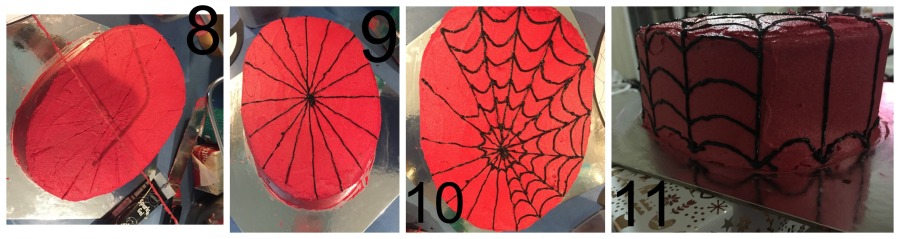
- To get the web placement right I used my wire cake leveller but you could use a knife, floss, clean fishing line etc to lightly mark your cake in sections.
- Now, here is where the hard work starts and your muscles get a work out. I used Wilton Black Sparkle Gel for the web. I used a skewer in the end to poke the hole as opposed to cutting the end off the tip for a finer result. Follow the lines you’ve made in step 8.
- Next do the little dips in between each part of the web
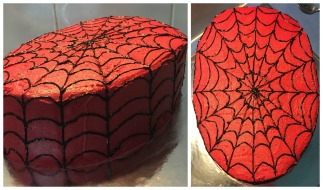 until the top is covered. Mine isn’t perfect, but the end result is effective. This is the part where I put the cake back in the fridge because my arms were killing me.
 - Next follow your lines down the side, start at the bottom and work your way up until you’ve finished all the way around. I kept telling myself it will be worth it in the end. My arm muscles certainly got a workout anyway 😉
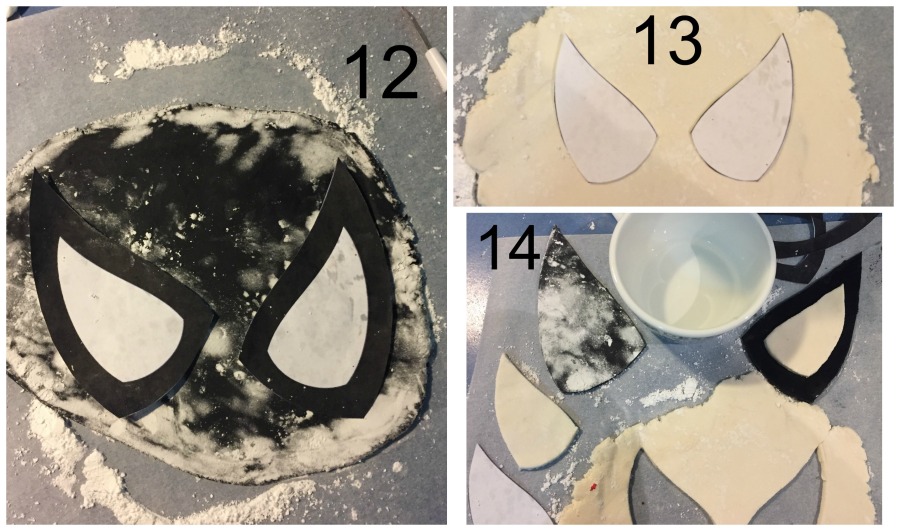
- Next is the eyes. I have made Marshmallow Fondant before and if you are completely covering a cake I highly recommend it! The taste is amazing and sooooo much better flavouring then the store bought stuff. Although, if you need black, purchase it. I have tried and tried again to successfully make black and it always turns out grey. I have been told to purchase the black powder, but am yet to try this. These fondants are purchased. I went back to my print out and cut out the eyes (but don’t throw out the face yet). Roll out the fondant (use icing sugar on baking paper and continue to move it as you’re rolling it out to keep it workable and not sticking to anything). Use a sharp knife to cut around the paper (I have a little tool that I use that is like a super small knife one end and a point at the other end)
- Trim the paper again and do the same with the white.
- Almost finished with the eyes…. Use water lightly on your finger to clean off the icing sugar and stick the white fondant to the black. Don’t use too much, it’s better to not use enough and add to it, you can’t take it back. Also, wash your hands after you touch the black – every. time. Trust me on this. It’s tricky to get black fingerprints off white fondant. It’s possible, but I prefer not to do it.
- Last step….. can you hardly believe it?!? Use the original face with the eyes to cut out to work out roughly where the eyes should sit. DON’T lay it down on the cake, just hover it over and get a rough idea.
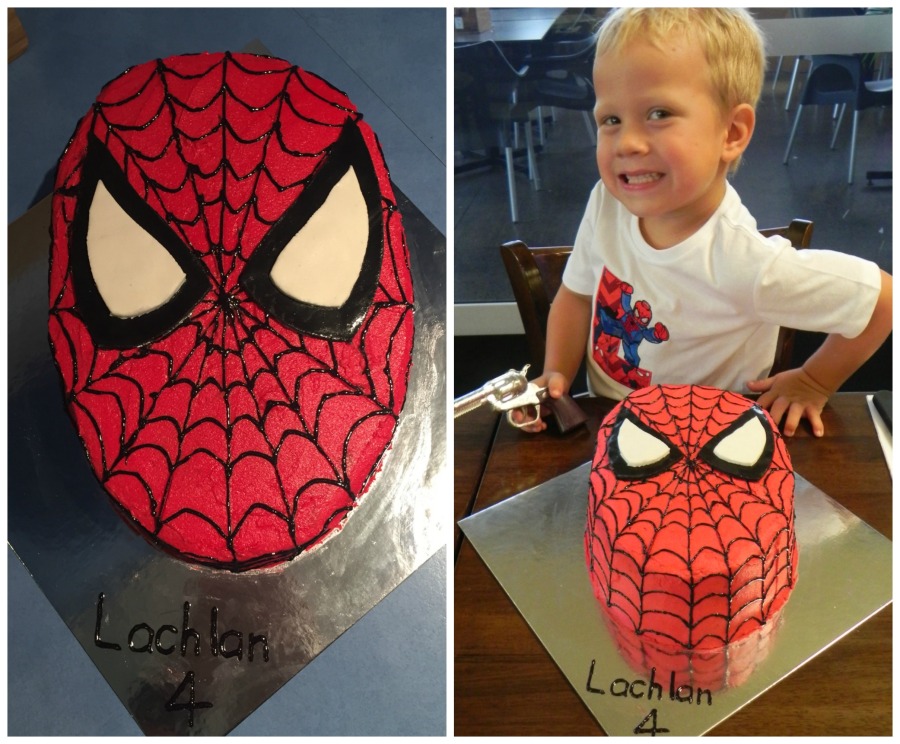 End result – Mr L LOVED IT!!!!! (I also had to make him a Spiderman outfit to wear to dinner, he thought his Lego Spiderman was so cool!
I’ll do more step-by-steps as I do more cakes and cupcakes throughout the year. Hope these inspire you to make your own cakes, even if they aren’t perfect, the kids still love them and I bet they won’t even notice or remember the imperfections, they’ll just remember that super cool Spiderman Cake you created with love.
Christine xx

Wow, love that spider man cake. That’s very interesting. Your kid is lucky to have you made that cake. Hi, our links are posted on Danny’s blog and I found you. I’m here to visit and follow, leave you a link and invite you to visit, hope we can get connected.
https://theshowersofblessing.wordpress.com/about-me/
LikeLiked by 1 person
Thank you. They aren’t always perfect, but I have a lot of fun creating them! I’ll pop by for a visit soon x
LikeLiked by 1 person
Thank you!! 🙂
LikeLike